Cyber Badge: an ESP32-C3 name badge that plays a video of you
A simple perfboard name badge: a 1.69in colour screen loops a short clip of you while a small OLED shows your name, running on an ESP32-C3 Super Mini and a LiPo.
What it is
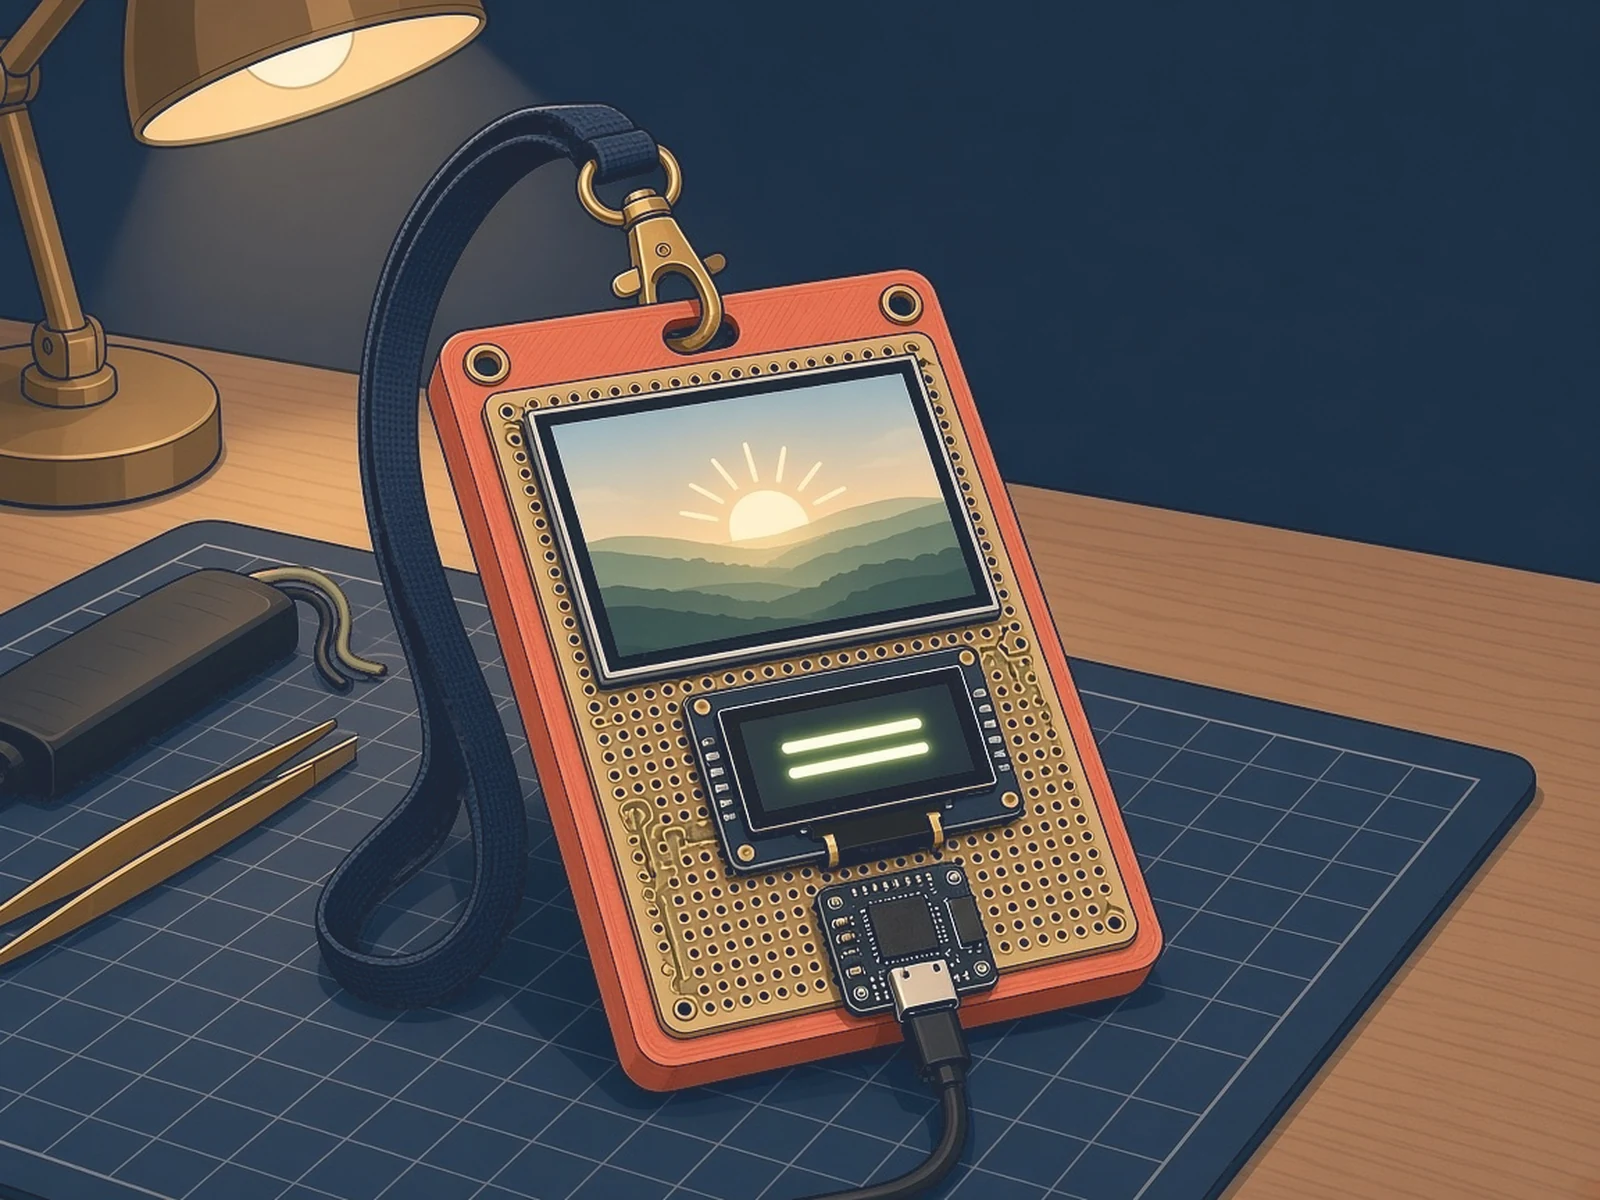
A homemade name badge with a tiny colour screen that loops a video of you and an OLED name tag, soldered onto one perfboard.
What you need
- ESP32-C3 Super Mini
- 1.69in ST7789 TFT
- 0.96in SSD1306 OLED
- TP4056 charger + LiPo 6-pad version with protection
How hard
Intermediate. A simple perfboard build, but you hand-wire both screens and the power path, and the LiPo wiring has to be right.
Photos
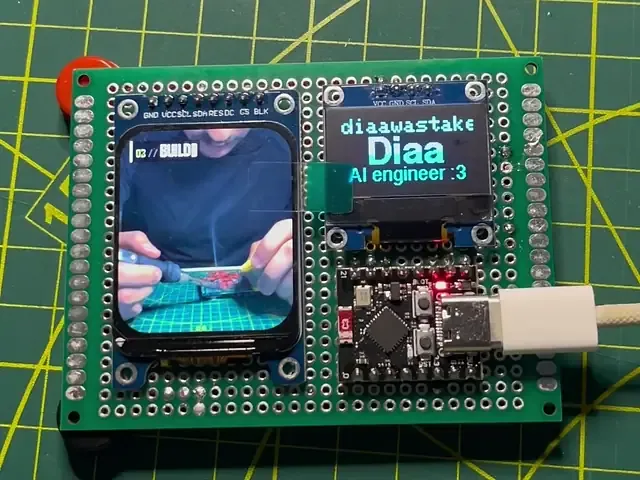
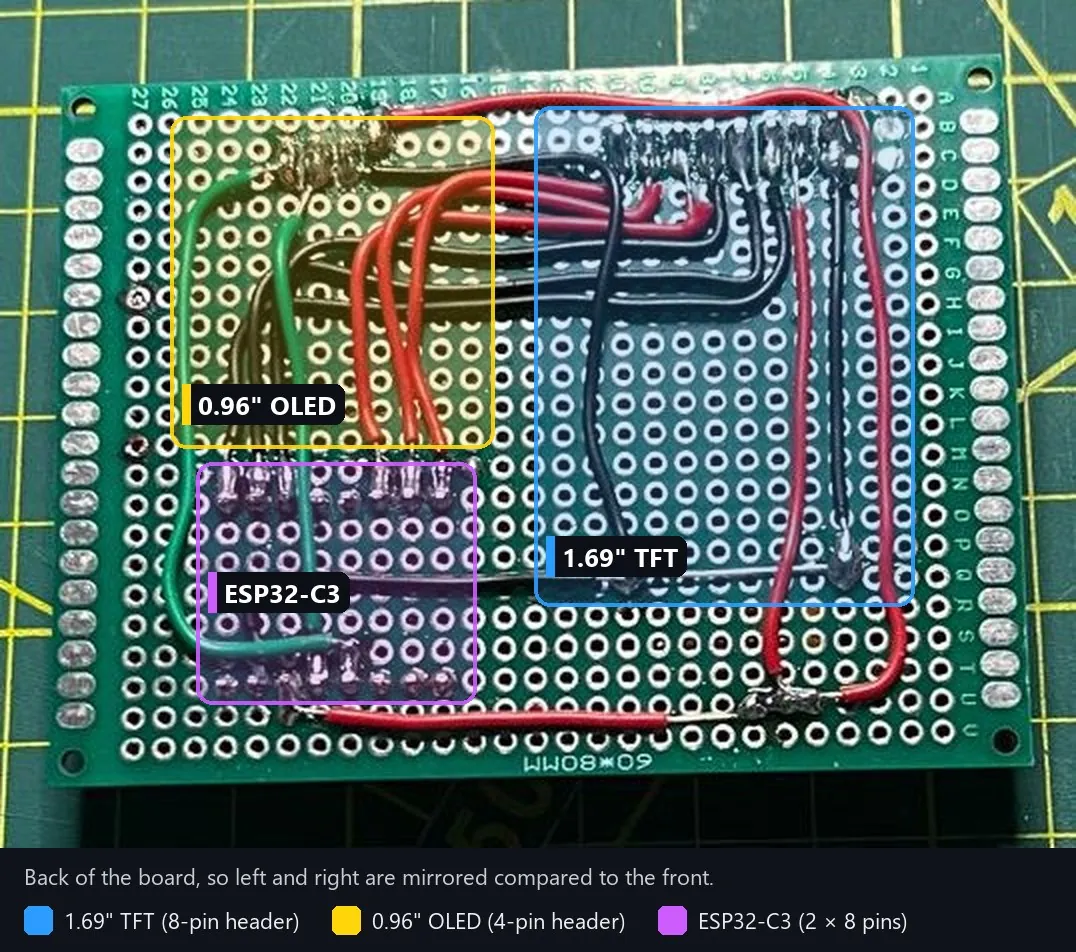
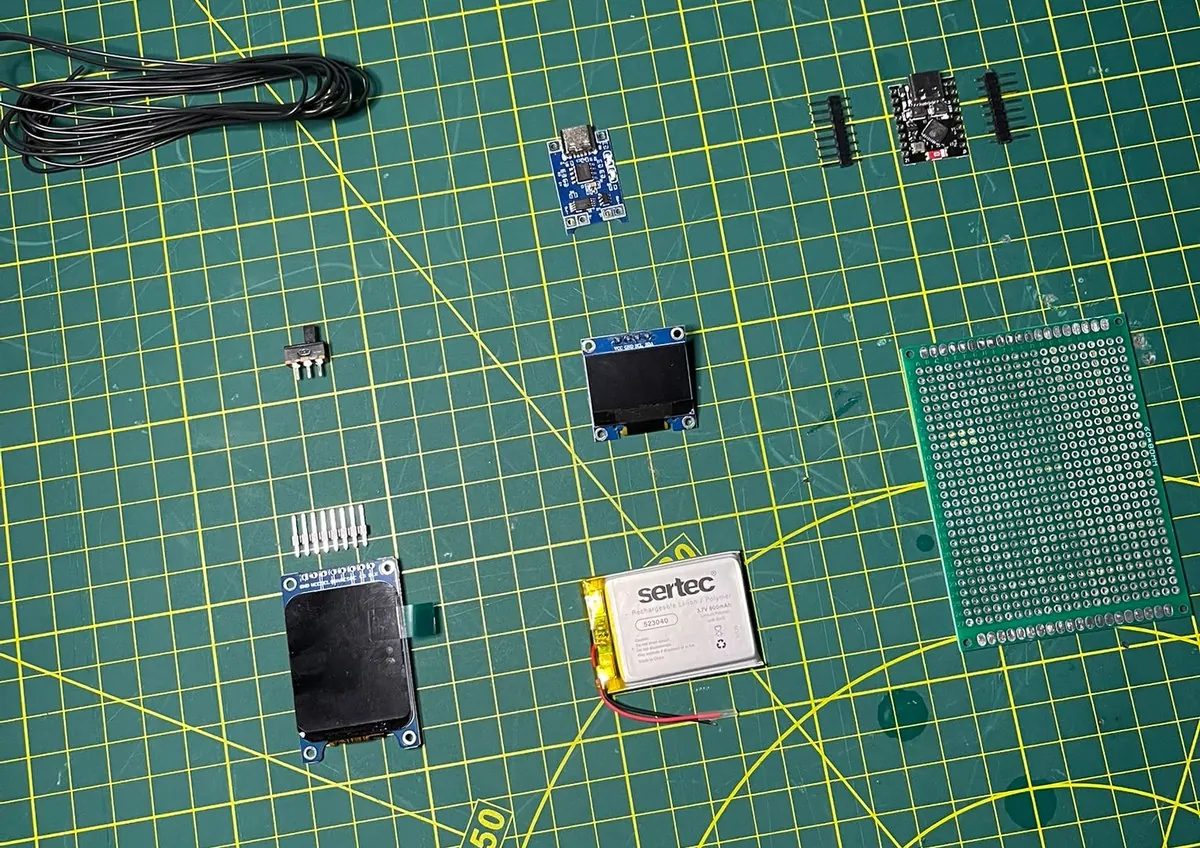
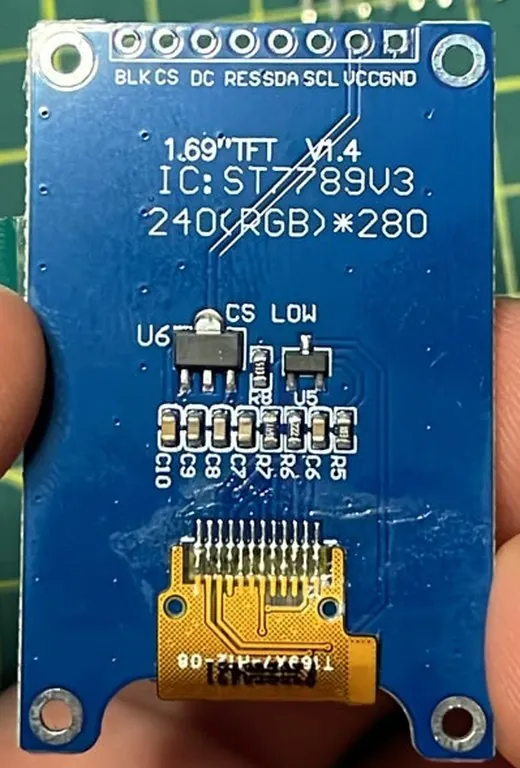
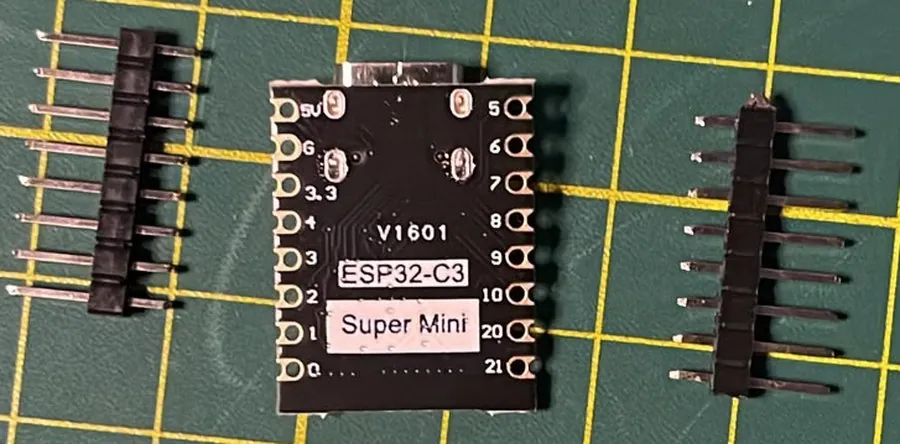
Photos: engineerdiaa/cyber-badge
Key Facts
- MCU: ESP32-C3 Super Mini; everything on one 60 × 80 mm perfboard
- Screens: 1.69in ST7789 TFT 240 × 280 (video) and 0.96in SSD1306 OLED 128 × 64 (name tag)
- Plays the clip at 16 fps (measured); about 15 s of video fits
- Power: 3.7 V LiPo (author uses 600 mAh), TP4056 with protection, slide switch
- Python tools turn a phone video into the firmware, with labels and effects
- Caution: TP4056 charges at 1 A by default; check it for small LiPos
- Licences: MIT firmware, CERN-OHL-P v2 hardware, CC BY 4.0 docs
About This Project
Cyber Badge, by Diaa (engineerdiaa on GitHub, @diaawastaken on Instagram), is a simple soldered build on one 60 × 80 mm perfboard. A 1.69in ST7789 TFT (240 × 280) loops a short video clip of you at a steady 16 fps (measured), and a 0.96in SSD1306 OLED shows your name and title with your email or handle scrolling along the top. The clip is stored in the ESP32-C3 Super Mini's flash as JPEG frames and sent to the screen with DMA. Power comes from a 3.7 V LiPo (the author's is a 600 mAh pouch behind the TFT) through a TP4056 charger with protection and a slide switch into the C3's 5V pin. Charging is over the TP4056's USB-C. The BOOT button switches between clips if you add more than one, and the badge remembers your choice. On your PC, two Python scripts turn a phone video into the firmware header: they crop and retime it, add scene labels that type themselves in (like 01 // TRAIN) and optional effects, a word that orbits around you or a sticker outline, which need a cut-out of you, made once with make_masks.py. About 15 seconds of video fits in total. You program it from the Arduino IDE with a few libraries (Adafruit GFX, SSD1306 and ST7789, JPEGDEC and bb_spi_lcd). The README walks through the wiring tables, header soldering, a multimeter check of the TFT's CS pin and a short check before first power-up. Two cautions from the author: TP4056 modules charge at 1 A by default, which is more than most small LiPos are rated for, so check and lower it for a small cell; never connect the battery to the C3's 3.3 V pin; take power from the TP4056's OUT+/OUT−, never B+/B−, which bypasses the battery protection; and switch the badge off before plugging USB into the C3, because with the switch on the USB 5V and the battery meet at the 5V pin. Licences: firmware and tools MIT, hardware CERN-OHL-P v2, docs and images CC BY 4.0, with credit to @diaawastaken.
Source & Attribution
Parts Needed
- ESP32-C3 Super Mini
- 1.69in ST7789 TFT 240×280
- 0.96in SSD1306 OLED
- TP4056 charger with protection (6 pads)
- 3.7 V LiPo
- SPDT slide switch
- 60 × 80 mm perfboard and wire
Steps
- 1
Check parts
Check the LiPo's polarity and the TP4056's charge resistor (R3, 1 A by default); lower it for a small battery. Mark the C3's 5V pin on the chip side.
- 2
Headers and layout
Solder headers using the perfboard as a jig. TFT on the left, OLED top right, C3 below it with USB-C at the edge.
- 3
TFT first
Measure TFT CS to GND. Wire the 8 TFT lines, upload the sketch from the Arduino IDE (Huge APP partition, USB CDC On Boot enabled) and check the clip plays.
- 4
OLED, then power
Add the 4 OLED wires and press RESET. With USB unplugged, wire LiPo to B+/B−, OUT+ through the switch to the C3's 5V, OUT− to G. Never wire the battery to 3.3, and never take power from B+/B−, which bypasses the protection. Put Kapton or electrical tape over the solder joints under the battery so they can't puncture the pouch.
- 5
Check and personalise
With the switch off, check 5V, G and 3.3 aren't shorted. Then set your name in the sketch and make your clip with tools/make_video.py. Switch the badge off every time before you plug USB into the C3: with the switch on, the USB 5V and the battery meet at the 5V pin.
Bill of Materials
Parts list
7 parts · 1 linked
Heads up: some Buy links are affiliate links. If you buy through one, MCU Atlas may earn a small commission at no extra cost to you. It never changes which parts we list. How this works
1× ST7789 SPI display
Get the 1.69in 240 × 280 version with the 8-pin header

1× TP4056 LiPo charger module
Get the 6-pad version with battery protection
1× LiPo battery
Not included: Pin headers (usually included with the screens and the C3), Soldering iron, multimeter, flush cutters, tweezers, Kapton and foam tape, A PC with Python 3.10+, ffmpeg and the Arduino IDE
Related Projects