SimpleFOC Arduino balancer: BLDC two-wheel balancing robot
A modular two-wheel balancing robot using gimbal BLDC motors and the SimpleFOC library on Arduino-class boards.

Photos
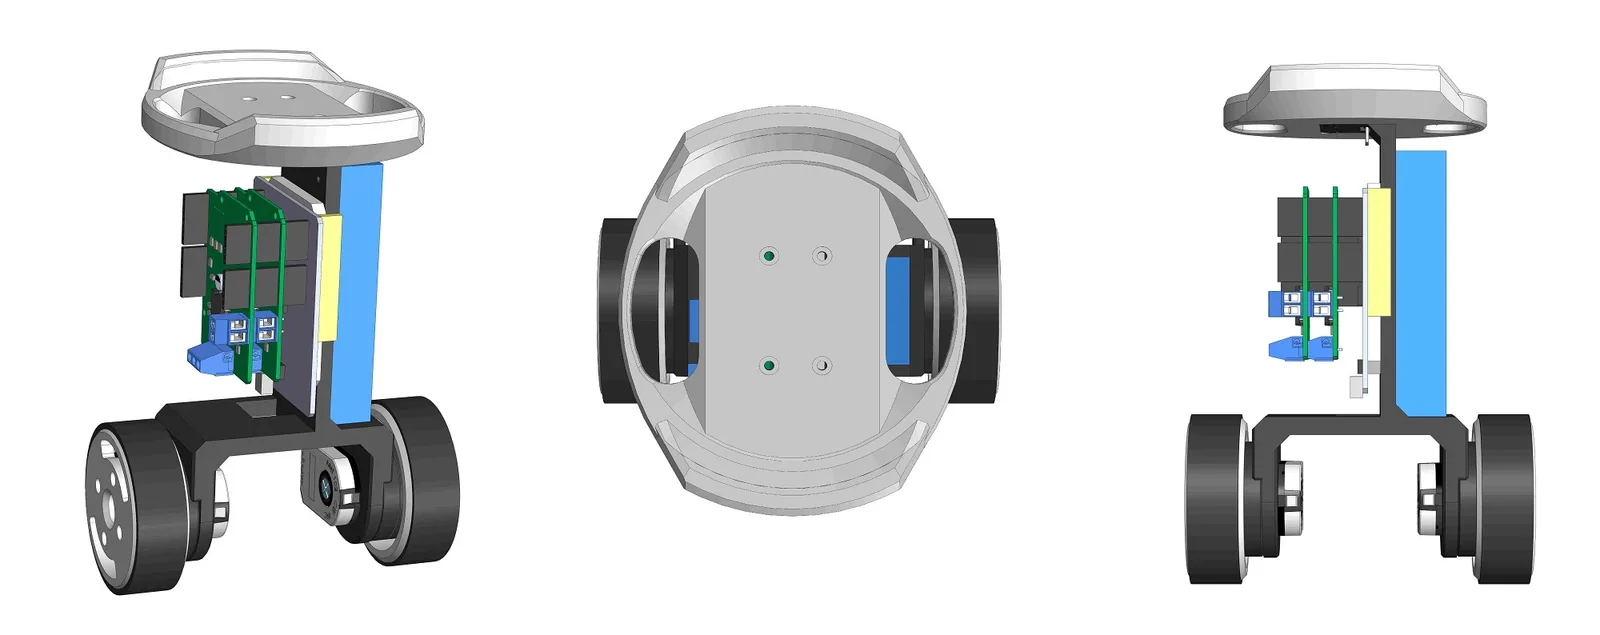

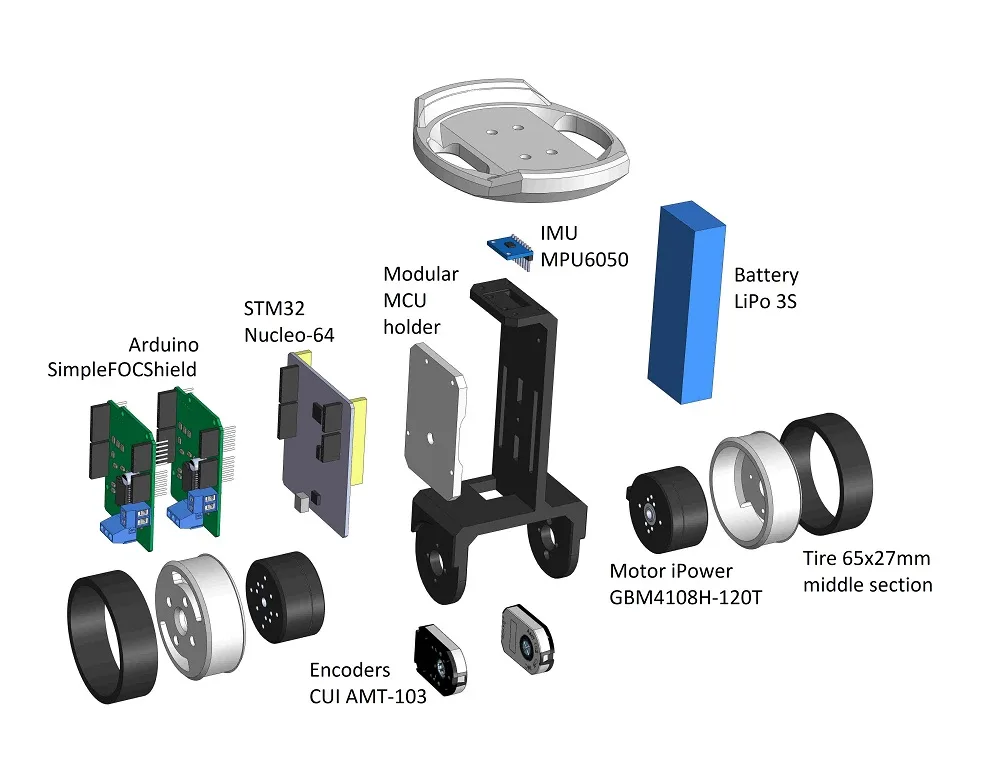

Photos: simplefoc/Arduino-FOC-balancer
Key Facts
- Motors: gimbal BLDCs
- Control: SimpleFOC FOC library
- Sensors: magnetic encoders + IMU
- MCU: Arduino-compatible (often STM32/ESP32)
About This Project
This SimpleFOC project builds a balancing robot around gimbal BLDC motors instead of brushed DC or steppers, which gives smoother and more dynamic control. Position is sensed with magnetic encoders, an IMU provides tilt, and the SimpleFOC library runs field-oriented control on an Arduino-compatible MCU (often STM32 or ESP32 in practice). Mechanical parts are 3D printed and the design is modular so you can swap motors, drivers and boards.
Source & Attribution
Parts Needed
- Arduino-compatible MCU (Uno, Nucleo/STM32 or ESP32)
- 2x gimbal BLDC motors
- 2x BLDC drivers (the author used SimpleFOCShield v2.0.3)
- 2x magnetic encoders (e.g. AS5600/AS5048) or another SimpleFOC-supported sensor
- IMU (MPU6050)
- 3D-printed parts (STEP/Solidworks in CAD folder), RC car tyres, screws
- 3S LiPo or 12V supply
- Optional: HC-05 Bluetooth for remote control
Steps
- 1
Print and build the frame
Print the parts from the CAD folder and assemble them with the motors, wheels and tyres. Mount the encoder magnets on the motor shafts.
- 2
Wire the electronics
Stack the two SimpleFOC shields on the MCU (with different pin configurations), then connect the motor phases, encoders and the I2C IMU.
- 3
Install libraries
In the Arduino IDE, install Simple FOC and the IMU library the sketch uses.
- 4
Tune each motor first
Run the SimpleFOC example sketches to check each motor and sensor pair works in velocity mode before you try balancing.
- 5
Flash the balancer
Upload the balancer sketch. Adjust the stabilisation PID and velocity controller gains until it holds upright, then add Bluetooth remote control if you like.
Not included: 3D-printed case, wire, solder, USB cable
Related Projects