XKC-Y25 water-tank monitor: three non-contact level sensors on an ESPHome XIAO ESP32C3
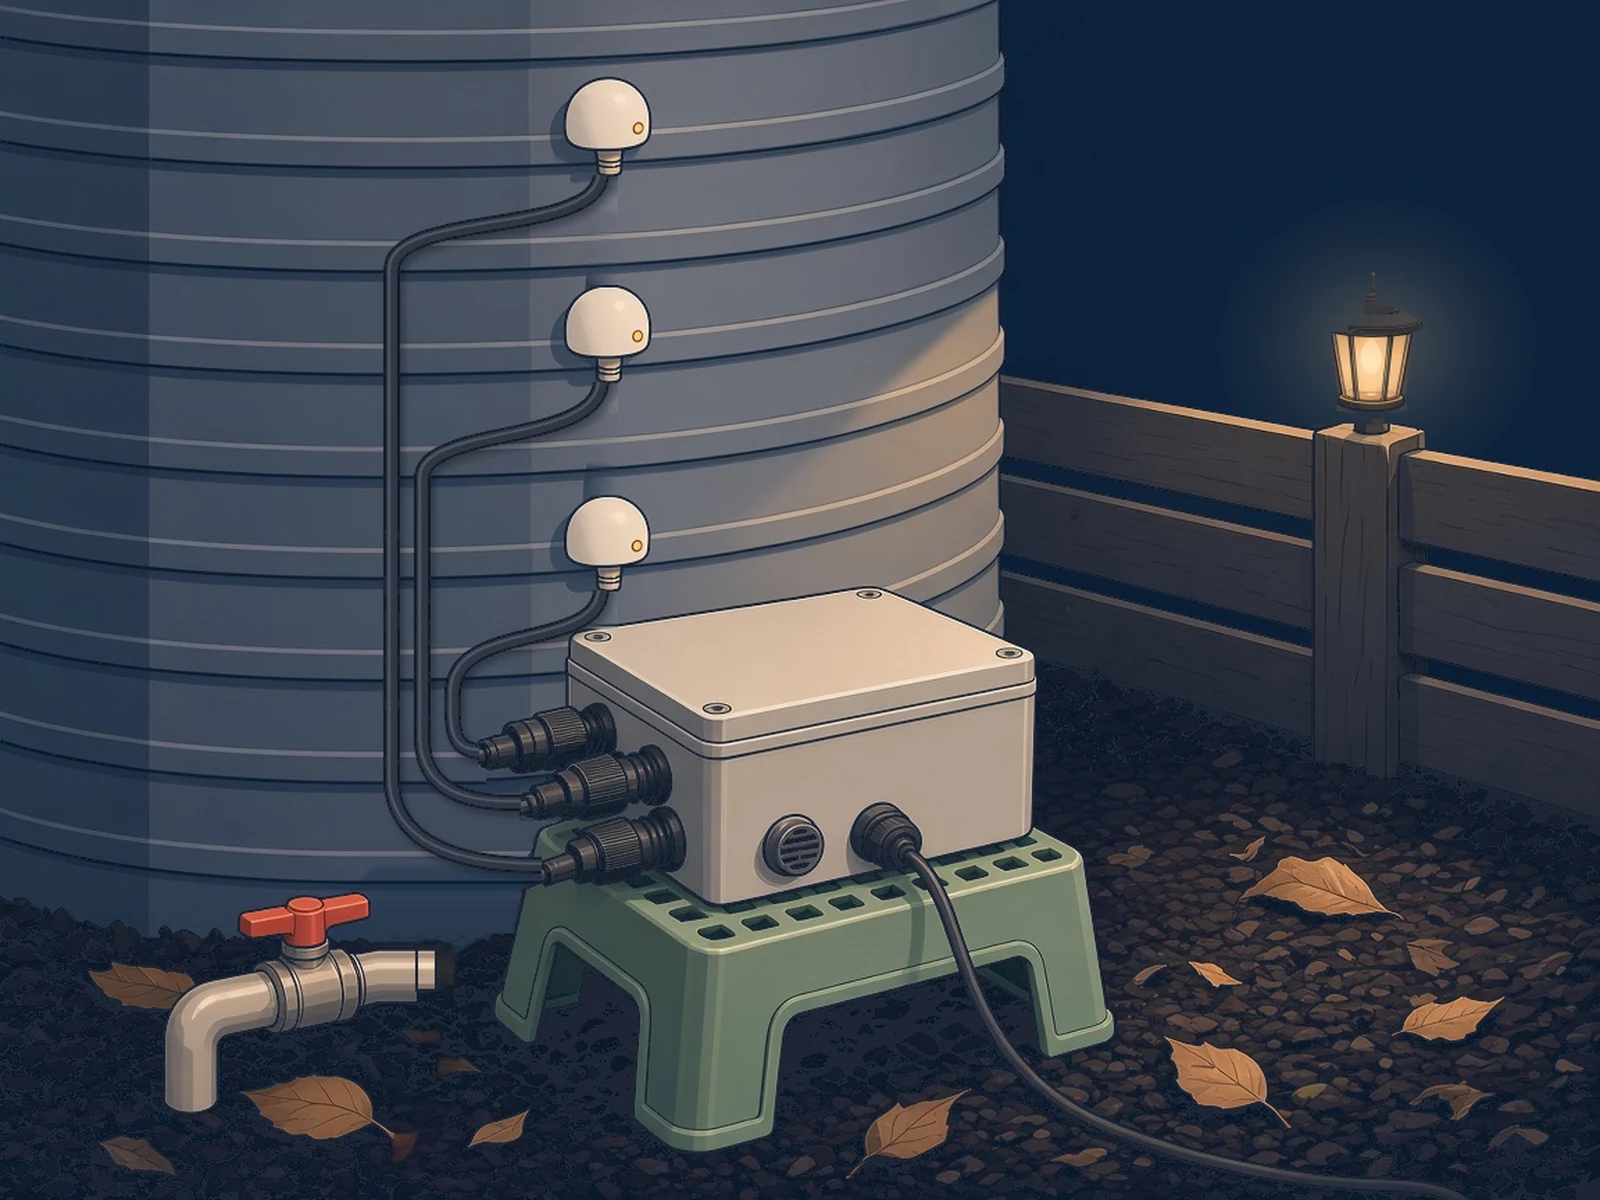
Three XKC-Y25-V sensors stuck to the outside of a plastic tank tell Home Assistant whether the water is above each one. Nothing touches the water. Our version runs from a USB charger.
What it is
Three sensors on the outside of a plastic water tank that tell Home Assistant how full it is, without touching the water.
What you need
How hard
Intermediate: three sensors and a level shifter to wire up, then ESPHome from the repo's YAML with three pin numbers changed.
Key Facts
- Three XKC-Y25-V non-contact capacitive sensors on GPIO3 (D1), GPIO4 (D2) and GPIO5 (D3)
- Sensors read through a non-metallic tank wall up to 20 mm thick (sensor manual)
- ESPHome on a Seeed XIAO ESP32C3 (esp-idf); Home Assistant discovers it
- 4-channel level shifter between the 5 V sensors and the 3.3 V ESP32
- Power: USB 5V from a wall charger (our adaptation; no mains wiring)
- MIT licence, by Sergey Varibrus (g1ibby)
About This Project
This build by Sergey Varibrus (g1ibby) watches the level in a stored-water tank without putting anything inside it. Three XKC-Y25-V capacitive sensors attach to the outside of a non-metallic tank wall at the levels you care about, for example low, middle and high. Each one sees whether there is liquid behind the wall at its height. A Seeed Studio XIAO ESP32C3 running ESPHome reads them and reports three binary sensors to Home Assistant, which discovers the device by itself, so you can chart the level and set up automations such as a low-water notification or switching off a pump when the tank is full. The firmware also reports the ESP32's internal temperature. The sensors run on 5 V and send a 5 V signal, so a small 4-channel logic level shifter brings each signal down to the XIAO's 3.3 V. In the creator's build everything sits in an IP67 box with IP68 SP13 plugs for the sensor cables and a breathable vent plug against condensation. Power: the creator's build runs from mains through an AC-DC module wired inside the box. This page shows a USB 5V version instead, and there is no mains wiring in it. The XIAO is powered over USB-C from an ordinary USB wall charger, and its 5V pin, which Seeed's wiki describes as "5v out from the USB port", feeds the sensors and the level shifter's high-voltage side. The three sensors draw 5 mA or less each, according to the sensor manual. This is our adaptation, not the creator's wiring.
Source & Attribution
Illustration
Parts Needed
- Seeed Studio XIAO ESP32C3
- 3 × XKC-Y25-V sensors
- 4-channel bi-directional logic level shifter
- USB wall charger
- USB data cable (USB-C)
- IP67 plastic enclosure
- SP13 4-pin waterproof connector × 3
- M12 breathable vent plug
- Jumper wires or a small PCB
- Home Assistant with ESPHome
Steps
- 1
Power (our USB 5V version)
Power the XIAO over USB-C from an ordinary USB wall charger. Take 5 V from the XIAO's 5V pin, which Seeed's wiki describes as "5v out from the USB port", to the level shifter's HV pin and to each sensor's brown wire. Take 3.3 V from the XIAO's 3V3 pin to the shifter's LV pin, and join all the grounds, including each sensor's blue wire. Don't wire anything to mains. Plug the charger into an indoor socket, or an outdoor socket with a weatherproof cover and GFCI (RCD) protection. The creator's build uses a mains module, and we've left it out.
- 2
Wire the signals
Sensor 1 yellow to HV1, and LV1 to GPIO3 (D1). Sensor 2 yellow to HV2, and LV2 to GPIO4 (D2). Sensor 3 yellow to HV3, and LV3 to GPIO5 (D3). Leave each sensor's black wire unconnected: in the manual, a floating black wire means the output goes high when the sensor detects liquid. The creator's original build used GPIO9, GPIO10 and GPIO8. We moved the sensors because GPIO8 and GPIO9 are strapping pins that set the boot mode at power-up (Espressif datasheet), and a dry sensor holds its line low, which can stop the XIAO booting after a power cut. If you buy the sensors on AliExpress, select the XKC-Y25-V option (high/low level output), not the NPN, PNP or RS485 versions.
- 3
Box it up
Mount the XIAO and the shifter in the IP67 box. Fit the three SP13 connectors for the sensor cables and the M12 vent plug in the box wall. Bring the USB cable in through a sealed entry.
- 4
Flash ESPHome
Create a new ESPHome device from the repo's esphome.yaml (board seeed_xiao_esp32c3, esp-idf framework). In its binary_sensor section, change the three pin numbers to match our wiring: GPIO9 to GPIO3 for Tank Level Sensor 1, GPIO10 to GPIO4 for Sensor 2 and GPIO8 to GPIO5 for Sensor 3. Put wifi_ssid and wifi_password in your secrets.yaml. Our note: the repo's YAML has no API encryption key and no OTA protection. Add an encryption key under api: as a !secret entry in secrets.yaml, and an empty encryption: block under ota:, which reuses that key (ESPHome recommends this over an OTA password). Flash it over USB the first time; after that you can update over Wi-Fi.
- 5
Add it to Home Assistant
Home Assistant discovers the device through the ESPHome integration. Click Configure, and Tank Level Sensor 1, 2 and 3 appear as binary sensors, along with the ESP32's internal temperature. Use them on a dashboard or in automations, such as a low-water notification.
- 6
Fit the sensors
Clean the tank wall and attach each sensor to the outside of the non-metallic wall at the level you want to watch, with good contact. The manual allows walls up to 20 mm thick. If a sensor is always on or always off, adjust the sensitivity knob under its back cover (counter-clockwise is more sensitive) and check the wiring.
Bill of Materials
Parts list
8 parts · 7 linked
Heads up: some Buy links are affiliate links. If you buy through one, MCU Atlas may earn a small commission at no extra cost to you. It never changes which parts we list. How this works



Not included: Jumper wires or a custom PCB, Home Assistant with the ESPHome integration, Glue to hold the sensors on the tank (the manual suggests AB glue)
Related Projects